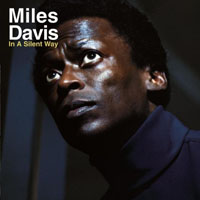
 Session 1: Listening assignment. In class today we’ll listen to a selection from Miles Davis “In a Silent Way”. The track is called “Shhh/Peaceful” and is one of the recording industries first examples of looping. In 1969 digital recording was science fiction, so to accomplish looping the producer had to literally cut and paste sections of pre-recorded analog tape together and then play them on reel-to-reel tape machines. The results from this experiment were far reaching and today looping is used extensively in the recording industry.
Our next assignment is to create sound effects. Stock sound effects are available in the LRC, but even with a vast library of recordings available, often recording your own sounds gives your productions more character. This assignment will have two parts. The first part is to create five sound effects by manipulating audio that you have available to you. Use DSP to modify the sounds so that they become something of your own. Keep the original sounds so that you can demonstrate how you changed what you started with.
Assignment 1: SFX Project Requirements
Search the sound effects available in the LRC.
Generally online resources are not acceptable for this project, but a new online resource called Freesound offers high quality sound effects uploaded by registered users. This online community licenses the content under Creative Commons, making the sounds legally available for most uses.
Reading:
Real World Digital Audio, Chapter 7 – Processing and Effects
A note about rendering audio from Pro Tools: Most of the assignments for this class require that you turn in a stereo interleaved wave format file at a sample rate of 44.1kHz and bit depth of 16bit, the same as a standard audio CD. To render audio in this format from the Pro Tools menu choose “File” > “Bounce” > “Audio”. Next, in the dialogue box choose “WAV” under “File Format”, “44.1kHz” under “Sample Rate”, “16 bit” under “Resolution”, and “Stereo Interleaved” under “Format”. Finally press “Bounce” to name and render the audio. It is important to understand that selecting a range in the “Edit” view before bouncing will only render that range. If you want to render the entire file, don’t select anything. Muting and soloing tracks is also reflected in the bounced audio.
Session 2: What are dynamic microphones and how do they differ from condenser mics? How do you choose the right mic for the right situation? How do microphone polar patterns effect he response of the mic? These are some of the questions we’ll be answering during lecture. After lecture we will be demonstrating the audio qualities of some of the different microphones that are available in the Cage by making some test recordings using the Pro Tools system. For your own purposes portable field recorders are available to check out from the E-Cage.
Knowing about the different types of microphones and how to use them is crucial to engineering high quality audio recordings. Dynamic microphones such as the Shure SM57 are very durable and excellent for recording loud signals such as close miked drums, guitar amps and so on. More sensitive condenser mics such as the Shure KSM32 or AKG c4000b are excellent for capturing the nuances in voices and quieter acoustic sounds.
Now that you have a basic understanding of microphones it’s time to start experimenting with them. This brings us to part two of our sound effects assignment. Record at least five unique sound effects using at least two different microphones. Be creative. You can use your own voice to create effects. Shutting doors, stomping on floors, breaking glass or hammering on pots and pans are a few examples of creating sound effects. Please have both parts of the assignment finished by the beginning of class on Session 1, Week 4 and we’ll listen to what you’ve created.
Reading:
Real World Digital Audio, Chapter 6 – Recording Instruments and Sound
Microphone Reading Assignment
A note to spring 2011 CA2431 Audio Production students:
I will be presenting my work at Hand Made Music Minneapolis on April 30, 2011. For more information visit http://www.tcmaker.org/hmmm/?p=119