Syllabus and Meeting Times

IM2490 Interactive Motion Scripting

An advanced course that applies motion graphics as an integrated interactive solution; students will script interaction, sequencing, and motion for interactive projects. Optimization is a critical consideration in the creation of the user-centered experience.

Instructor: John Keston
Meeting Times and Location:
M/W 2:00pm – 5:00pm Room P305 LaSalle Building

Syllabus:
IM2490 Interactive Motion Scripting Syllabus

Week 1 | Week 2 | Week 3 | Week 4 | Week 5 | Week 6
Week 7 | Week 8 | Week 9 | Week 10 | Week 11

Week 1

Google's Calculator

Session 1: Today we will be covering the syllabus as well as reviewing the curriculum for the class. We will also introduce ourselves and establish the background and skill level of the class members. As the course description states in the the syllabus this class is “An advanced course that applies motion graphics as an integrated interactive solution; students will script interaction, sequencing, and motion for interactive projects.”

Although this description implies Flash and ActionScript development, the majority of our focus will be on covering the new JavaScript capabilities available through the use of frameworks such as jQuery, and functionality unique to JavaScript and HTML5.

To get started we will begin by reviewing some JavaScript basics. In class today we will cover the lessons starting at JS HOME and ending with JS Popup Boxes.
Eloquent Javascript

Session 2: Let us start today by browsing through some of the examples on Chrome Experiments. This site hosts a growing number of experiments built by developers using HTML5, JavaScript, Canvas, and SVG. Afterward we will continue looking at JavaScript and cover the lessons starting with JS Functions Intro and finishing with JS JSON.

Assignment 1: Simple JS Calculator Web Application (10 Points)
Due: Session 2, Week 2 (Beginning of Class)

Description:
Build a simple calculator using HTML, CSS, and JavaScript. At a minimum the calculator must be able to do addition, subtraction, multiplication, and division. Use html forms to create a text field for the numbers, buttons for the functions and operators (+,-,*,/), and buttons to calculate and clear the text field. Add more functions such as percent, modulus, square root, and/or exponents. This exercise will help create an understanding of variables, expressions, assignment operators, logical operators, and functions. Use the Mozilla JavaScript Reference to look up the Math object and other functions and syntax.

Requirements:
1. Use HTML, CSS, and JavaScript to build a Calculator
2. The tool must give the correct answer for an expression of two numbers
3. Addition, subtraction, multiplication, and division are required operators
4. Add additional functions such as percent, modulus, or exponents
5. Do NOT use the eval() function (here’s why not)
6. Use CSS to style the calculator and enhance the user interface
7. Upload a zip of your environment to the Dropoff Drive by session 1 of Week 5

Point Breakdown:
5 points are awarded for properly functioning features within the calculator application
5 points are awarded for user experience design considerations and the look & feel of the app

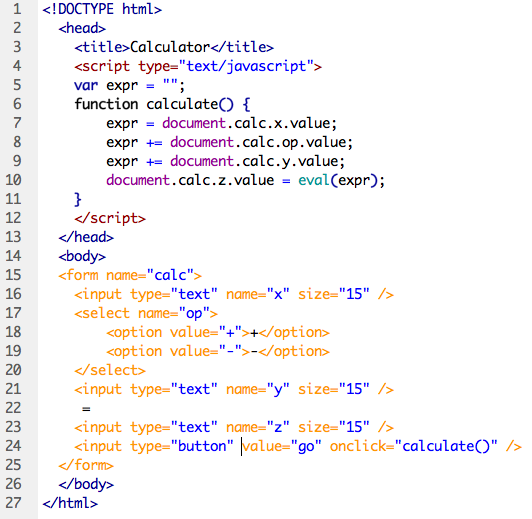
Here’s an incomplete example to get you started:

Week 2

Session 1: Wikipedia describes HTML5 as “…a standard for structuring and presenting content on the World Wide Web. The new standard incorporates features like video playback and drag-and-drop that have been previously dependent on third-party browser plug-ins such as Adobe Flash and Microsoft Silverlight.” Although HTML5 is not considered “ready for prime time” it is being utilized by developers and organizations to push the envelope of what it possible in the browser as we saw last week on Chrome Experiments. HTML5 has several goals including consistent, defined error handling, and better-defined semantic roles for existing elements, but one of the most promising is the attempt to transform the browser into an application platform.

Let’s spend the lab time today covering as many chapters as we can on the w3schools HTML5 tutorial starting with HTML5 Home.

Assignment 2: “Google-Fu” Interactive Design Research Skills
Due: Before Session 2 of the Assigned Week (6 points)

Description:
Each student will be assigned one of nine weeks (2-10) from the class content. The student is required to research the content for their week using Google and find three current and relevant web-based articles about the subject(s) contained within their assigned week that are not already included in the class content. The link to each article and a 1-3 sentence description must be entered as a comment on the class website before session 2 of the assigned week.

Requirements:
1. Enter a single comment with three links and descriptions for the assigned week
2. Make sure the links are current, relevant, and not previously included in the course content
3. Enter your comment 24 hours before session 2 of the assigned week for approval

Points Breakdown:
1 point is awarded for each relevant link
1 point is awarded for an accurate description of the article

Session 2: Today we will learn how to tween or animate objects using HTML5, the <canvas> tag, and JavaScript. Let’s start by going through the Canvas tutorial on the Mozilla Developer Network (MDN).

Assignment 3: HTML5 and JS Animated Circle (10 Points)
Due: Session 2, Week 3 (Beginning of Class)
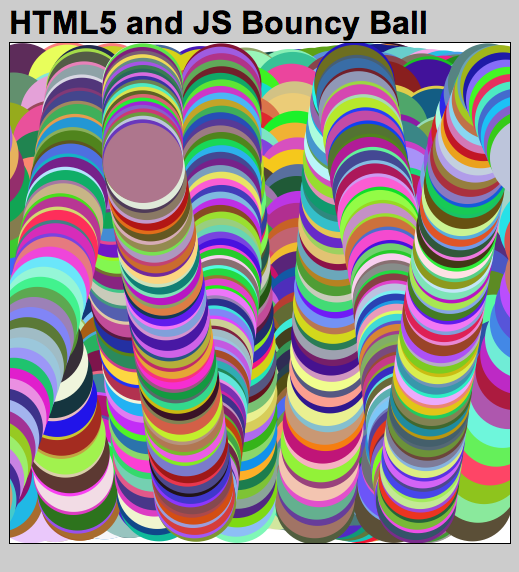
Using the setInterval() function, animate a circle on a 500 by 500 pixel canvas within an HTML5 document. Use the example code below as a starting point. Start by making the circle bounce back from the edges of the canvas. Next clear the canvas repeatedly so that the circle appears to be animated. Try enhancing the animation by cycling the colors of the circle, either randomly, or through a range. Adjust the bounce point so that part of the circle is not hidden.

Requirements:
1. Use HTML5 and JavaScript to animate a circle in a 500 by 500 pixel canvas
2. Clear the canvas so that the circle appears to animate
3. Cycle the colors and / or the size of the circle to enhance the animation
4. Adjust the bounce point so that part of the circle is not hidden
5. Experiment in other ways to make your exercise unique

<!DOCTYPE html> 
<html> 
<head> 
<meta http-equiv="Content-Type" content="text/html; charset=utf-8" /> 
<title>HTML5 Bouncing Ball</title> 
<script type="text/javascript"> 
var ctx;
var dx = 5; var dy = 4;
var y = 250; var x = 250;
function draw(){
	ctx = myCanvas.getContext('2d');
	ctx.beginPath();  
	ctx.fillStyle = "#00bb00";
	ctx.arc(x,y,40,0,Math.PI*2,true);
	ctx.closePath();
	ctx.fill();
	if( x < 0 || x > 500) {
		dx = -dx;		
	}
	if( y < 0 || y > 500 ) {
		dy = -dy;
	}            
	x += dx;
	y += dy;
} 
// call a function repeatedly at a set interval
setInterval(draw,30); 
</script> 
</head> 
<body>               
<h1>HTML5 and JS Bouncy Ball</h1>
<div> 	
	<canvas id="myCanvas" width="500" height="500"></canvas>
</div>
</body> 
</html>

In comparison, here’s code to create a similar animation using Processing.org

float y = 50.0;
float x = 50.0;
float speedX = 1.0;
float speedY = 1.0;
float radius = 15.0;
int directionX = 1;
int directionY = -1.1;

void setup() {
  size(400,400);
  background(0);
  smooth();
  noStroke();
  ellipseMode(RADIUS);
}

void draw() {
  fill(0,12);
  rect(0,0,width,height);
  fill(255);
  ellipse(x,y,radius,radius);
  x += speedX * directionX;
  if ((x > height-radius) || (x < radius)) {
    directionX = -directionX;
  }
  y += speedY * directionY;
  if ((y > height-radius) || (y < radius)) {
    directionY = -directionY;
  }
}

Week 3

Session 1: As we have seen, creating animation with pure JavaScript is promising, but can also be time consuming and cumbersome. Another way to unlock the animation potential of the HTML5 Canvas tag is by using a JS framework. Much less code is necessary when you have pre-written classes and objects to support common motion graphic techniques, like tweens, fades, color manipulation, and transitions. One well developed JavaScript framework for HTML5 vector graphics and animation is Raphaƫl.

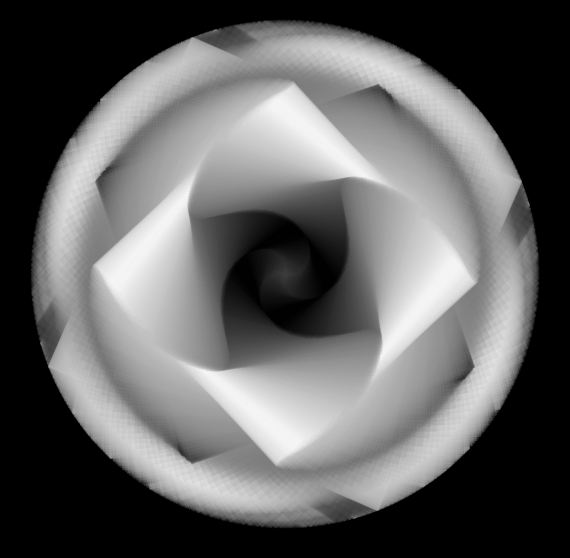
However, the most advanced framework currently available is the Processing.js project. Let’s review some examples including a project of mine that I ported from Processing.org linked below.


Interactive Rectangles

Processing.js is based on Processing.org developed at MIT by Ben Fry and Casey Reas. The Processing language was developed to attract artists and designers to programming. It is easy to learn, yet powerful enough to create complex software like the GMS by John Keston. Here’s a list of notable Processing developers.

Robert Hodgin (flight404.com)
Jeremy Thorp (blprnt.com)
Jared Tarbell (complexification.net)
Daniel Shiffman (www.shiffman.net)
The Nature of Code by Daniel Shiffman
Ira Greenberg (www.iragreenberg.com)
Wes Grubbs (www.devedeset.com)
Ben Fry (benfry.com)
Casey Reas (reas.com)

Session 2: Let’s start today by viewing the results of the HTML5 and JS Animated Circle. Afterward let’s continue our look at Processing.js. After using sketch.processing.org to look at a few more examples, we will go over the requirements for the next exercise.

Assignment 3: HTML5 and Processing.js OOP Exercise (15 Points)
Due: Session 1, Week 5 (Beginning of Class)
Use HTML5, Processing.js and Object Oriented Programming techniques to create multiple animated shapes on a canvas that respond to mouse movement. Try to make the shapes chase the mouse pointer, rather than follow it directly. Try rotating shapes such as rectangles or triangles to reflect the position of the mouse.

Requirements:
1. Setup your HTML5 and Processing.js environment
2. Create a class with a constructor and methods to build and animate the objects
2. Use the setup() and draw() functions to animate five or more objects
3. Use mouseX and MouseY to cause the shapes to respond to mouse movement
4. Try rotating the shapes in response to the mouse movement
5. Try causing the shapes to gravitate toward the mouse rather than following it directly

Week 4

Session 1: Based on the HTML5 and JavaScript Animated Circle exercise, we have seen that in order to make multiple instances of shapes on the canvas we need to duplicate many lines of code creating redundancies that make the code long and difficult to manage. This “brute force” technique might be acceptable for two or three shapes, but soon it becomes apparent that a better way must be possible. This is where Object Oriented Programming techniques are useful.

// Simple OOP example &quot;Spot&quot;

Spot sp; // Declare the object

void setup() {
  size(200,200)
  sp = new Spot(100,100,50); // Construct the object
}

void draw() {  
  background(0);
  sp.display();
}

class Spot { // Define the class
  float x,y,d; // x position, y position, diameter
  
  Spot(float xpos, float ypos, float diameter) { // Constructor for the object 
    x = xpos;
    y = ypos;
    d = diameter;
  } 
  void display() { // Method (function) to display the object
    ellipse(x,y,d,d);
  }
}

The example above creates a simple spot on the canvas as an object. Developing this example a little further allows for multiple instances of the object created in an array. Then properties such as the size, position, and speed of each spot can be adjusted to produce interesting results. Here’s an active version of the above script developed a little further.


OOP Animated Circles

More resources:
codepen.io
“CodePen is all about front end code inspiration and education through sharing. In the editor, enter HTML, CSS, and JavaScript and the combined result is displayed below. Save your Pen, share it, and explore others. This is extremely useful for showing off your work, troubleshooting, demonstrating bugs, or anything else you can think of.”

Here’s an example I made from last week’s demo:

Session 2: Today we will continue working on the HTML5 and Processing.js OOP exercise. I’ll be demonstrating some more examples of object oriented techniques using the Processing.js framework, including ways to interact with shapes rendered to the canvas.

  void travel() {
    translate(width/2, height/2);
    rotate(PI/(3*(mouseX/800)));
    x += (mouseX - x)/(s*40); 
  }

Also, let’s revisit an updated version of Bouncy Bubbles. This slightly more complex example of object oriented code gives us an opportunity explore the simulation of gravity and collisions.

// All Examples Written by Casey Reas and Ben Fry
// unless otherwise stated. UPDATE: by John Keston to include ball color and reset method.
int numBalls = 50;
float spring = 0.05;
float gravity = 0.2;
Ball[] balls = new Ball[numBalls];
 
void setup() {
  size(600, 400);
  //noStroke();
  smooth();
  for (int i = 0; i < numBalls; i++) {
    balls[i] = new Ball(random(width), random(height), random(20, 40), i, balls,random(255),random(50),random(100));
  }
}
void mouseClicked() {
  for (int i = 0; i < numBalls; i++) {
    balls[i].reset();
  }
}
// Or, add a new ball each time the mouse is clicked
/* void mouseClicked() {
  numBalls += 1;
  balls.add(new Ball(mouseX, mouseY, random(20, 40), numBalls, balls,random(255),random(50),random(100)));
} */
void draw()
{
  background(128);
  for (int i = 0; i < numBalls; i++) {
    balls[i].collide();
    balls[i].move();
    balls[i].display();
  }
}
 
class Ball {
  float x, y;
  float diameter;
  float vx = 0;
  float vy = 0;
  int r,g,b,id;
  Ball[] others;
 
  Ball(float xin, float yin, float din, int idin, Ball[] oin, int cr, int cg, int cb) {
    x = xin;
    y = yin;
    diameter = din;
    id = idin;
    r = cr;
    g = cg;
    b = cb;
    others = oin;
  } 
 
  void collide() {
    for (int i = id + 1; i < numBalls; i++) {
      float dx = others[i].x - x;
      float dy = others[i].y - y;
      float distance = sqrt(dx*dx + dy*dy);
      float minDist = others[i].diameter/2 + diameter/2;
      if (distance < minDist) {
        float angle = atan2(dy, dx);
        float targetX = x + cos(angle) * minDist;
        float targetY = y + sin(angle) * minDist;
        float ax = (targetX - others[i].x) * spring;
        float ay = (targetY - others[i].y) * spring;
        vx -= ax;
        vy -= ay;
        others[i].vx += ax;
        others[i].vy += ay;
      }
    }
  }
 
  void move() {
    vy += gravity;
    x += vx;
    y += vy;
    if (x + diameter/2 > width) {
      x = width - diameter/2;
      vx *= -0.9;
    }
    else if (x - diameter/2 < 0) {
      x = diameter/2;
      vx *= -0.9;
    }
    if (y + diameter/2 > height) {
      y = height - diameter/2;
      vy *= -0.9;
    }
    else if (y - diameter/2 < 0) {
      y = diameter/2;
      vy *= -0.9;
    }
  }
 
  void reset() {
    x = mouseX;
    y = mouseY;
  }
 
  void display() {
    fill(r,g,b,204);
    ellipse(x, y, diameter, diameter);
  }
}

Original example (Bouncy Bubbles) on Processing.js.

A Note About Rendering Audio in Pro Tools

Most of the assignments for this class require that you turn in a stereo interleaved wave format file at a sample rate of 44.1kHz and bit depth of 16bit, the same as a standard audio CD. To render audio in this format from the Pro Tools menu choose “File” > “Bounce” > “Audio”. Next, in the dialogue box choose “WAV” under “File Format”, “44.1kHz” under “Sample Rate”, “16 bit” under “Resolution”, and “Stereo Interleaved” under “Format”.

Finally press “Bounce” to name and render the audio. It is important to understand that selecting a range in the “Edit” view before bouncing will only render that range. If you want to render the entire file, don’t select anything. Muting and soloing tracks is also reflected in the bounced audio.

Week 5

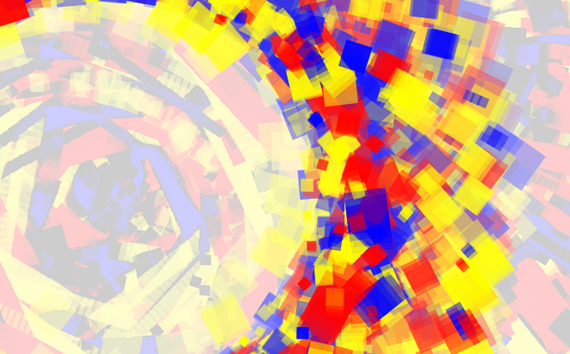
Session 1: Today we will review your HTML5 and Processing.js OOP exercise. Here’s the example I presented in class last week.


Primary Squares

Here’s a second example that we will look at as a precursor to experimenting with particle systems. In this example the particles are expanding rings that grow and intersect as they are added by the user, either by clicking or dragging on the canvas.


Intersecting Rings

// Define the Ring class. Notice that no constructor is
// needed because the start method is used to initiate
// the objects behavior.
class Ring {
    float x,y,diameter;
    boolean on = false;
    void start(float xpos, float ypos) {
        x = xpos;
        y = ypos;
        on = true;
        diameter = 1;
    }
    void grow() {
        if (on) {
            diameter += 0.5;
            if (diameter &amp;gt; 600) {
                on = false;
            }
        }
    }
    void display() {
        if (on) {
            noFill();
            strokeWeight(4);
            stroke(255,153);
            ellipse(x,y,diameter,diameter);
        }
    }
}

Ring[] rings;
int numRings = 100;
int currentRing = 0;

void setup() {
    background(0);
    size(800,400);
    smooth();rings = new Ring[numRings];
    for (int i=0; i &amp;lt; numRings; i++) {
        rings[i] = new Ring();
    }
}

void draw() {
    fill(0,5);
    rect(0,0,width,height);
    for (int i=0; i &amp;lt; numRings; i++) {
        rings[i].grow();
        rings[i].display();
    }
}

void mousePressed() {
    rings[currentRing].start(mouseX,mouseY);
    currentRing++;
    if (currentRing &amp;gt;= numRings) {
        currentRing = 0;
    }
}

void mouseDragged() {
    if (frameCount % 5 == 0) {
        rings[currentRing].start(mouseX,mouseY);
        currentRing++;
        if (currentRing &amp;gt;= numRings) {
            currentRing = 0;
        }
    }
}

Session 2: Today we will be looking closely at particle system examples such as Daniel Shiffmans Simple Particle System hosted on processing.org. Other examples include a smoke particle system, and

Assignment 4: HTML5 and Processing.js Particle System (20 Points)
Due: Session 2, Week 7 (Beginning of Class)
Use HTML5, and Processing.js to create a dynamic particle system. Your application must allow the user to enter the number of particles that they would like to render and interact with. Create several switchable modes of interaction, such as brownian motion, mouse pointer attraction / repulsion, and speed adjustments.

Requirements:
1. Setup your HTML5 and Processing.js environment
2. Create a class with a constructor and methods to build and animate the particles
3. Use HTML forms and JavaScript to dynamically adjust the number particles
4. Use HTML forms and JavaScript to dynamically adjust the behavior of the particles
5. Consider constraining the particles to the canvas by changing direction at the borders
6. Try creating trails on the particles that can be enabled or disabled
7. Add one or more of your own features, such as color manipulation, etc. to make your project unique