GD1400 Computer Applications

This course is designed to introduce students to the world of computers through lecture and laboratory sessions. Lectures will introduce the conceptual framework of computer systems and how they work, as well as implications of computer technology in our contemporary environment. The laboratory sessions will provide hand skills on a specific computer system and will teach functions within a computer environment to complete projects.

Syllabus and Meeting Times

GD1400 Computer Applications

This course is designed to introduce students to the world of computers through lecture and laboratory sessions. Lectures will introduce the conceptual framework of computer systems and how they work, as well as implications of computer technology in our contemporary environment. The laboratory sessions will provide hand skills on a specific computer system and will teach functions within a computer environment to complete projects.

Instructor: John Keston

Meeting Times and Location Section M2 (T/R):
Session 1 / Session 2
T/R 8am-11am (with appropriate breaks), Room 108, Pence Building.

Syllabus: GD1400 Computer Applications

Week 1

Session 1: Syllabus and introductions. What was your first computer?

Session 2: Email. What it is? When did it start (1965)? How has it evolved? Email / Online etiquette.

Email Assignment (5 points)
Due Session 2, Week 1

1. Setup a Gmail account.
2. Forward your OLS email to Gmail.
3. Choose a theme.
4. Add contacts.
5. Create labels.
6. Create an email filter.

Reading: http://en.wikipedia.org/wiki/Email

Week 2

Session 1: Consumer based computer applications are no longer limited to out-of-the-box proprietary products from developers like Microsoft and Adobe. The contemporary software environment includes a vast landscape of Open Source applications like Mozilla Firefox and Open Office as well as web based applications like Flickr and Google Docs. For the first few exercises in this class we will be utilizing Gmail and Google Docs to demonstrate how typical computing tasks can be solved via free to use web applications.

Sharing Part 1 – Email and Contacts (5 points)

Setup a Gmail account and add the email address jck362@gmail.com to your contacts. Send an email to jck362@gmail.com so I can add you as a contact as well. Add two or three other contacts as well. Use the OLS preferences page (http://stu.aii.edu) to forward your OLS emails to your Gmail account. Choose one of the available themes for your Gmail account. Create one or more labels and filter specific messages into your filter.

Sharing Part 2 – Text Documents (10 points)

Using Google Docs create a document that contains definitions for all of the computer terms in the assignment sheet. Use a search engine like Wikipedia, Google, or Yahoo to find short and concise definitions. Paste the definitions into your document. Once it is complete. Share the document with me (jck362@gmail.com) using the sharing option in Google Docs.

For complete instructions download the following word document:
GD1400 Sharing Exercise (15 points)

Session 2: Spreadsheet applications have been available since the dawn of the personal computer. VisiCalc (the Apple IIs killer app) is considered the first example of commercially available spreadsheet software for personal computers. Spreadsheets may contain rows and columns of data, or lists of contact information. It might include formulas to make calculations such as averages, or sums. They are often used for financial information because one change in the document can automatically trigger a recalculation of all the formulas with it. Other uses include grading students, compiling survey figures, sales data, invoices, budget plans, and expense reports. A recent development is the emergence of web-based spreadsheets, which allow for strong multi-user collaboration features.

For complete instructions download the following word document:
GD1400 Spreadsheet Exercise (15 points)

Week 3

Session 1: Today we will be finishing Part 2 of the spreadsheet assignment. Secondly, we will discuss the next assignment the Warhol project (details in class). Scanning. Bring a three dimensional item to scan in the flat bed scanners.

Session 2: Intro to Photoshop filters.

Marilyn

Image manipulation has become commonplace in our industry and society in general. Print, television and, interactive media all rely on techniques made possible with image processing applications like Photoshop. Photoshop is intended for processing bitmap images versus another type of imagery called vectors that we will be examining as well. In this assignment we will be using filters to create a grid of four filtered images in the spirit of Andy Warhol’s Marilyn portraits.

Warhol Assignment (15 points)
Due Session 2, Week 4

For complete instructions download the following word document:
GD1400 Warhol Assignment (Photoshop Filters)

Week 4

Session 1: Processing photographic imagery is used in a wide variety tasks. Print advertising, packaging, promotional materials, presentations, and fine art all take advantage of techniques made possible with photo processing software. Using processed photographic images in presentations is an important skill regardless of ones chosen professional field. The photo manipulation and slideshow project provides an opportunity to learn several ways to process photos and include them in a presentation with titles, textual captions, and transitions.

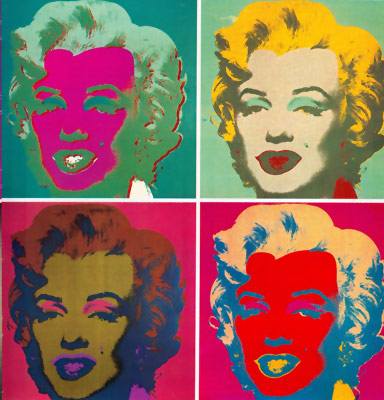
Use a digital camera to shoot a minimum of twelve photographs. Choose a theme for your photos like buildings, people, animals, objects, or textures. Be creative. Shoot photos in both portrait and landscape modes. Process each photograph in Photoshop to prepare the images for use in a presentation. Crop and resize all you photo and use at least one example of each of the following techniques: convert to black and white (grayscale), convert to duotone (i.e. sepia tone), brightness/contrast, hue/saturation, and invert.

For complete instructions download the following Word document:
Photo Manipulation and Slideshow Presentation

Session 2: Use PowerPoint to create a twelve-panel slideshow presentation of your processed photographs. Each slide must include the photo, a title for the photo and a short description. Experiment with different layout techniques for each slide. Apply transitions between slides to learn how to apply transitions, and then never do it again. Transitions should be used sparingly so as not to distract your audience.

To keep things in perspective, the following article explains the dangers of using PowerPoint, or similar applications for presentations.
PowerPoint Is Evil By Edward Tufte

Week 5

Session 1: Flash is an extremely versatile application, which allows users to create an infinite array of applications from something as simple as motion graphics to as complex as fully functional, arcade style games. Our next assignment will be to create a bouncing ball in Flash. An example of a bouncing ball made in Flash is available here:

Bouncing Ball Example

For complete instructions download the following Word document:
Bouncing Ball Assignment (Adobe Flash)

Session 2: Today I’ll be demonstrating exactly how to create a bouncing ball in Flash. To create the bouncing ball, start a new document in Flash. Select the oval tool and draw a circle. To constrain your ball to a perfect circle, hold down the shift key while dragging. You can also choose to select a fill color or gradient to make your ball a little more fancy. After your satisfied, from the Insert menu choose “Convert to Symbol”. Make sure you name it and select graphic as the type.

Insert a key frame at frame 10 and another at frame 20 (for a slower bounce try inserting the key frames at 20 and 40). Select the middle key frame and shift+drag the ball to the bottom of the scene. Here you can also adjust the height property of the ball so that it appears to squash down a bit as it strikes the floor.

Now select the 1st key frame and in the properties panel choose “motion” under “Tween” and set the ease to -100. On the middle turn on the motion tween as well and set the ease equal to 100. Hit ctrl+enter to watch the animated ball bounce. When you’re finished please email a copy your assignment to jck362@gmail.com.

Week 6

Session 1: Today we are going to continue experimenting with Flash. Specifically we will be learning how to apply shape tweens. Shape tweens can be used to morph objects from one shape to another (i.e. a circle to a square). This technique is especially useful for animation. Another technique you can use in Flash is to create unique logos by shape tweening between characters in a typeface. This will allow you to create unique logos that would otherwise be very difficult to create. Here’s an example logo that I created using this technique.

uem_logo.png

For complete instructions download the following Word document:
Shape Tween Logo Assignment (Adobe Flash)

Session 2: Adobe Illustrator can be used for more deliberate techniques. The principal difference between Photoshop and Illustrator is the concept of bitmap versus vector graphics. Vector graphics have a distinct advantage of bitmap images for logo designs because of the ability to print or display at any size without seeing any loss of detail, like you would with a bitmap image.

The next assignment involves creating a set of five vector based logos using Illustrator. For your first logo, use the same technique we used for the Flash logo, then save if from Flash as an Illustrator file and place it in your project. For the rest of the logos make them out of a group of letters and use a different font for each logo. Place all five logos in the same document one after another and align them on the page. Experiment with the kerning, tracking, and type treatments. Use transform and drawing tools to manipulate several of the logos. Use the create outlines function to convert the type into vector shapes. Ungroup your shape to manipulate individual letters using the white arrow tool, scale, and transform tool.

A Variety of Type Treatments and Transformations Using Illustrator

For complete instructions download the following Word document:
Illustrator Logos Project

Week 7

Session 1: School closed.

Session 2: Today we will start working on our first project that involves using the web server space that we all have available through the school on the OLS system. The Internet is a vast and complex network that includes the World Wide Web. A simple way to imagine the Web is as a delivery platform. Postal services deliver physical packages to geographical locations. The Web delivers electronic packages to and from computers all over the world. These data packages are reassembled into files made up of text, images, video, sound, and interactive content. In the next project we will make some of our own content available on a web page including a thumbnail link to a full sized image, text, and links.

For complete instructions download the following Word document:
Assignment 9: Simple Web Page

Week 8

Session 1: Today we will start working on our final project. For the final project we will be building a web site using Dreamweaver as an authoring tool. This will be the most complicated and difficult project for the class, therefore we will build the project in stages. Each stage will include a weekly, required project milestone. For each milestone you will be expected to demonstrate that you have completed specific tasks leading up to the completion of the project by week 11, Session 1.

For complete instructions download the following word document:
Assignment 10: Final Web Site

Session 2: Today I’ll be demonstrating how to design a web page using tables. As we begin designing the final web site, keep in mind areas of the screen needed for design elements, navigation, and content.

Final Project Milestone 1:
1. Demonstrate how to set document properties in Dreamweaver
2. Show an example of a table centered with content and background colors
3. All text content must be set to a typeface other than the default

Week 9

Session 1: Today I’ll be demonstrating some techniques in Dreamweaver to help you setup the navigation links on your final website project. I also show you how to produce the “Photos” page where you are expected to have a minimum of four thumbnails organized on the same page. I suggest that you make each thumbnail exactly the same dimensions. This means you may have to crop your images for the thumbnail, but the full size versions can maintain the original aspect ratio.

Session 2: Today I’ll be reviewing how to upload your content to the OLS server. We will also be reviewing your projects to make sure you are meeting the second milestone requirements (listed below).

Final Project Milestone 2:
1. Have a minimum of two pages completed
2. Be prepared to illustrate your navigation functioning on two pages
3. Show two examples of your content uploaded to your OLS account

Week 10

Session 1: Today I’ll be demonstrating how to present a Flash animation in a web page. I will also be showing some more techniques for improving the overall design of your final websites. For example, I’ll show how to make the larger content that expands when clicking on thumbnail images into the same design format as the rest of your pages. We will also make a list of things that you can do to improve your site

Session 2: Today is the third and last of our project milestones. It’s also the last opportunity to get feedback on your final project. For milestone number three we are expecting you to have all five of your pages uploaded to the OLS as well as your navigation and Flash animation all working properly.

Project Milestone 3:
1. It’s recommended that you have you site completed and ready for final feedback
2. All five pages of your final website must be uploaded to the OLS
3. Navigation must complete and work from each page to every other page
4. The Flash bouncing ball animation must function properly on the Animation page

Week 11

Session 1: Final Web Site presentations.

Session 2: Final Web Site presentations continued.