CA2431 Audio Production

This course is a conceptual introduction to audio production techniques. Students will understand to digitize sound and apply it to their work. Students will also learn how to produce appropriate audio effects and transitions.

Syllabus and Meeting Times

CA2431 Audio Production

This course is a conceptual introduction to audio production techniques. Students will understand to digitize sound and apply it to their work. Students will also learn how to produce appropriate audio effects and transitions.

Instructor: John Keston

Meeting Times and Location:
Wednesday, Room 229 5:00pm – 6:00pm

Syllabus:
CA2431 Audio Production Syllabus

Glossary of Terms: ca2431glossary.doc

Week 1 | Week 2 | Week 3 | Week 4 | Week 5 | Week 6
Week 7 | Week 8 | Week 9 | Week 10 | Week 11

Week 1

Session 1: Today we’ll discuss a few principals of sound itself. Sound is made up of high and low pressure waves that travel through matter. We can perceive sound traveling through air at frequencies ranging from roughly 20hz to 20khz, and are able to record it using microphones and analog or digital recording media.

What’s the difference between analog and digital recording? Analog recording translates the sound waves into an analog electronic signal which is then stored on magnetically sensitive tape. Digital recording samples the sound at intervals in time. The rate of these intervals is called the sampling rate and is indicated in Hertz or KiloHertz. The faster the rate, the higher the recording quality. The sampling bit depth indicates the resolution of the sample, or how the amplitude of the sampled sound wave is divided. CDs use 16 bit resolution and a sampling rate of 44.1Khz (KiloHertz). The information is then stored on some type of digital media such as a hard drive in a computer, a CD, or a DAT (Digital Audio Tape) cassette.

Please bring a set of closed ear headphones and a CD which contains some audio to sample from for our in class exercise week 1, session 2. The assignment will involve basic Pro Tools techniques including sampling and signal processing.

Required Reading:
Recording Technology History
Digital Audio Basics
Reading:
Real World Digital Audio, Chapter 1 – Understanding Digital Sound

Files:
Sine wave files

Vi Hart video on sound:
http://www.youtube.com/user/Vihart#p/u/1/i_0DXxNeaQ0

Session 2: Today we will be sampling from a cd of your choice and then using DSP to loop and manipulate a small segment of a piece of digital audio from your CD. Use iTunes convert a track from your CD into a .wav file, then import the audio into Pro Tools. I will be demonstrating this process in the lab.

Once you’ve converted your track, use Pro Tools to select a reagion or loop of audio that you want to work with. Apply pitch shifting and at least two more kinds of processing in order to come up with a new and completely different sounding loop. When you’re happy with the results bounce the audio to a new file and copy the loop to the drop off drive in the “John Keston” folder under “ca2431” in a directory named . We will listen to the loops in class on so make sure you have finished before Session 1, Week 2.

DSP or Digital Signal Processing is the manipulation digital audio without converting it to analog. There are many different types of DSP. Each type is essentially a different algorithm with a set of user adjustable parameters used to manipulate digital audio. Some examples of DSP include level or volume adjustments, equalization or filtering, panning, looping, delay or echo, reverberation, time compression or expansion, and pitch shifting.

Pro Tools 7 Quick Keys for Macintosh

A note about Pro Tools Documents:
Pro Tools documents are called sessions. Each session is a folder that contains the Pro Tools file with a .PTF extension, and various other files and folders necessary to open the session. These include the “Audio Files” folder that contains all of the imported and recorded sounds in your project. It is critical that you backup the entire Pro Tools session folder on an external volume to preserve your project for editing or re-rendering (bouncing).

If you do not have access to an external volume you can backup your project on a network drive, however, this will probably fail due to long file names in your “Audio Files” folder. DO NOT rename these files! To work around this problem, first create an archive (.zip) of your session folder and then copy it to the network drive location. An easy way to create the .zip file on the Mac is to right+click the folder and choose “Compress my_session”. Remember that all students have access to the network drive, so only use this method if you have no alternative.

Week 2

Miles Davis - In a Silent Way
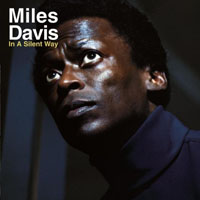
Session 1: Listening assignment. In class today we’ll listen to a selection from Miles Davis “In a Silent Way”. The track is called “Shhh/Peaceful” and is one of the recording industries first examples of looping. In 1969 digital recording was science fiction, so to accomplish looping the producer had to literally cut and paste sections of pre-recorded analog tape together and then play them on reel-to-reel tape machines. The results from this experiment were far reaching and today looping is used extensively in the recording industry.

Our next assignment is to create sound effects. Stock sound effects are available in the LRC, but even with a vast library of recordings available, often recording your own sounds gives your productions more character. This assignment will have two parts. The first part is to create five sound effects by manipulating audio that you have available to you. Use DSP to modify the sounds so that they become something of your own. Keep the original sounds so that you can demonstrate how you changed what you started with.

Assignment 1: SFX Project Requirements

Search the sound effects available in the LRC.

Generally online resources are not acceptable for this project, but a new online resource called Freesound offers high quality sound effects uploaded by registered users. This online community licenses the content under Creative Commons, making the sounds legally available for most uses.

Reading:
Real World Digital Audio, Chapter 7 – Processing and Effects

A note about rendering audio from Pro Tools: Most of the assignments for this class require that you turn in a stereo interleaved wave format file at a sample rate of 44.1kHz and bit depth of 16bit, the same as a standard audio CD. To render audio in this format from the Pro Tools menu choose “File” > “Bounce” > “Audio”. Next, in the dialogue box choose “WAV” under “File Format”, “44.1kHz” under “Sample Rate”, “16 bit” under “Resolution”, and “Stereo Interleaved” under “Format”. Finally press “Bounce” to name and render the audio. It is important to understand that selecting a range in the “Edit” view before bouncing will only render that range. If you want to render the entire file, don’t select anything. Muting and soloing tracks is also reflected in the bounced audio.

Session 2: What are dynamic microphones and how do they differ from condenser mics? How do you choose the right mic for the right situation? How do microphone polar patterns effect he response of the mic? These are some of the questions we’ll be answering during lecture. After lecture we will be demonstrating the audio qualities of some of the different microphones that are available in the Cage by making some test recordings using the Pro Tools system. For your own purposes portable field recorders are available to check out from the E-Cage.

Knowing about the different types of microphones and how to use them is crucial to engineering high quality audio recordings. Dynamic microphones such as the Shure SM57 are very durable and excellent for recording loud signals such as close miked drums, guitar amps and so on. More sensitive condenser mics such as the Shure KSM32 or AKG c4000b are excellent for capturing the nuances in voices and quieter acoustic sounds.

Now that you have a basic understanding of microphones it’s time to start experimenting with them. This brings us to part two of our sound effects assignment. Record at least five unique sound effects using at least two different microphones. Be creative. You can use your own voice to create effects. Shutting doors, stomping on floors, breaking glass or hammering on pots and pans are a few examples of creating sound effects. Please have both parts of the assignment finished by the beginning of class on Session 1, Week 4 and we’ll listen to what you’ve created.

Reading:
Real World Digital Audio, Chapter 6 – Recording Instruments and Sound
Microphone Reading Assignment

Week 3

Session 1: We will be discussing the proper use of mixers and recording devices. How to adjust signal levels, prevent clipping, reduce noise, microphone inputs, equalization, solo/mute, and auxiliary sends will be some of the the topics we’ll be discussing.

Note:
To record your sounds outside of the building for your projects you will need to use the Fostex FR-2LE or a DAT recorder (both available in the Cage). Using the Fostex FR-2LE is the preferred method. For instructions on using the device click here.

For the DAT recorder buy a DAT tape and checkout the DAT field recorder with microphone(s). DAT tapes can be purchased at Guitar Center or the Supply Store.

Recording with the TASCAM DA-P1 DAT recorders (decks):
1. Insert DAT tape into the recorder and make sure the write protect tab is enabled (closed position)
2. Connect your microphone(s) to the XLR inputs in the DAT recorder
a. Use the left channel for mono recording
b. Use both channels for stereo recordings
3. Set the ANALOG INPUT switch to the MIC position
4. Set the INPUT switch to ANALOG
5. Enable the PHANTOM power when using condersor microphones
6. Press the RECORD button to arm the DAT deck for recording
7. Adjust the input levels until you have a strong signal without clipping
8. Press and HOLD the RECORD button and PLAY to start recording

Transfering your recording to Pro Tools via SPDIF and the MBox:
1. Connect the DIGITAL OUT from the DAT recorder to the SPDIF in on the MBox
2. Start a new session in Pro Tools
3. Create a new stereo or mono track for your recording
4. MBox 1 (light blue model): Under the “Setups” menu choose “Hardware Setup” and switch the inputs from “Analog” to “SPDIF”
5. MBox 2 (dark blue model): Change the track I/O to S/PDIF (L Mono) or S/PDIF (L/R Stereo). The I/O view can be enabled under View > Edit Window > I/O.
6. Press the “R” (record arm) button on your track
7. Press PLAY on the DAT recorder to monitor the input in Pro Tools
8. Press “Record” and then “Play” on the transport in Pro Tools to start transfering your recordings

Session 2: Let’s start working on our next assignment which involves multitracking. Please mix 5 or more tracks of audio in Pro Tools utilizing the techniques we discussed in class. Avoid clipping and keep noise to a minimum. When looping try to find “zero crossings” within the wave to avoid pops. Use equalization to “place” individual tracks within the mix. Use several sound sources, such as dialogue or vocals recorded with microphones, sound effects from the sound effects collection in the library, sounds effects (Foley) recorded with microphones and/or musical instruments. Follow the link below to download the project requirement details in MS Word format.

Assignment 2: Multitrack Project Requirements

Plugins/Inserts: So far we have been applying DSP with the Audio Suite menu in Pro Tools. This method manipulates the selected audio and creates a new waveform which replaces the original audio on the track. This technique is know as destructive editing. The advantage to apply effects this way is that the processing happens only once and does not continually tax the CPU of your computer. The disadvantage is that the processing is destructive; unless you undo or revert to the original, you cannot easily return to the previous state or adjust the effect once it’s applied. This is why it is much better to use non-destructive DSP plugins (or inserts) in your projects. Inserts are processed in real-time so that you can make adjustments to the effect as you listen to the track, temporarily disable (bipass) the effect, or remove the effect comletely without having to revert to the original audio.

TDM – Time Division Multiplexing
RTAS – Real-time Audio Suite

Reading:
What is a Software Plugin?
Video on how to create Aux Sends in Pro Tools

Finally, when working on projects with multiple tracks it is critical that you set up a master fader in order to be able to visualize how the tracks levels are interacting. Each additional track that plays simultaneously increases the overall levels of the project. A master fader will illustrate the combined levels in the project so you can avoid clipping while keeping your levels as high as possible to prevent excessive noise.

Week 4

Session 1: Both parts of your sound effects assignment are due today. Please make sure that all your sounds are copied to the drop off drive so we can listen to them in the studio. We’ll be listening to your sound effects in class. Also, keep working on your multi tracking project. The most important thing is that your five tracks work well together. This project will be due before class two weeks from today on Session 1, Week 6. Mix down your project and save it as a .WAV file (44khz, 16bit) and copy the file to the drop off drive. We’ll listen to them in class on Session 1, Week 6. Also, today I would like to listen to how everyone’s doing on their projects so far and give you all some feedback, so please be prepared to show me your work in lab.

Finally let’s take a careful look at Equalization in Pro Tools. Equalization, or EQ, is critical when mixing multiple tracks of audio together. Layering sounds with similar frequencies can often cause a “muddy” mix unless each track is taylored with EQ to work well together. The following article has an excellent explanation of a few different types of eq filtering.

http://en.wikipedia.org/wiki/Equalization_filter

Session 2: Check out these links to other digital audio software programs. In this class we’ll be focusing on just a few examples (Sound Forge, Vegas, Pro Tools and Reason), but there are dozens of excellent and innovative applications for creating music, manipulating audio or generating new sounds never heard before.

Digital Audio Production Software
Pro Tools – www.avid.com
Sonar – www.cakewalk.com
CuBase – www.steinberg.net
Logic – www.apple.com/logic
Digital Performer – www.motu.com

Soft Synths
Reaktor – www.native-instruments.com
Absynth – www.native-instruments.com
B4 – www.native-instruments.com
Kontakt – www.native-instruments.com
Reason – www.propellerheads.se

Odd stuff
Ableton LIVE – www.ableton.com
Recycle – www.propellerheads.se

Writing Assignment: Write a one page paper on an audio production application that we will not necessarily use in this class. Discuss what makes the software unique and how you and professionals in the industry might use the software in projects. This paper will be due on Session 2 of Week 5.

Week 5

Session 1: Today we’ll be watching an episode of Cowboy Bebop as a listening exercise and inspiration for the Animatic Project, which we’ll be discussing next class. While watching, pay particular attention to the audio that has been meticulously produced for this series. Not only is the music superb, but also the sound design is of outstanding cinematic standards. Be prepared to discuss specific examples from the audio after watching the episode. While watching and listening please answer the questions on the document linked below and turn it in after the exercise has been completed.

Animation Listening Exercise

FYI: The entire Cowboy Bebop series is available in the library. Directed by Watanabe Shinichirou and music by Yoko Kanno (her music compositions are excellent, and make the series for me). Here’s a few links to peak your interest:

http://www.cowboybebop.org/english/ – The official Cowboy Bebop: The Movie site.
http://www.cowboybebop.org/english/door/interview/index.html – Interview with the director.
http://www.ex.org/4.5/16-interview_kanno1.html – An excellent interview with Kanno Yoko.

Multitrack Project Milestone:
1. Show that you have a minimum of three tracks in your Pro Tools document
2. Illustrate the use of a master fader
3. Demonstrate the use of inserts on one or more tracks
4. Enable at least one example of automation in your work in progress

Session 2: Starting next week I’ll be demonstrating more techniques in both ProTools and Reason. Here are the requirements for the final Project options. The final project involves combining visual imagery with sound. One of the key competencies is synchronizing the sound with the visuals or vice versa. Typically if you are creating animation you will record the sound first. For video, you generally need to replace the existing sound. You piece can be an animatic created from storyboards, an interactive piece, video, or animation. Another acceptable method is to create a derivative work fropm footage in the public domain. A vast amount of archival footage can be viewed and downloaded from archive.org.

Option 1: Final Animatic Project
Description:
The Final Animatic is a two minute visual piece without a second project and intended for longer more complicated animated sequences or visuals (video, interactive, etc.).
Due: Session 1, Week 11
Points: 50

1. Minimum length is 2:00. If working in groups of two 4:00.
2. A minimum of 8 panels if creating animatic (16 if paired) are required. Other visuals are acceptable including flash animation, slide shows, video, etc.
3. Use ProTools LE (with mBox) or ProTools 24 (in 007) to produce your audio.
4. Use foley techniques to records 50% of your Sound Effects.
5. A one page script is required which includes dialogue and, more importantly, sound design notes.
6. Compile your project in one of the following accepted formats: .mov, .mpeg, .avi, or .swf
7. A minimum of 10 tracks of audio in ProTools is required.
8. Include 2 screenshots of your ProTools work in progress with your project (command+shift+3 creates a screenshot on the desktop).
9 . Try to maintain the highest possible audio quality. For MP3s do not compress your audio any more than 44.1khz and 128Kbps. Wave files should be rendered as 44.1k 16bit.
10. Copy your project with screen shots to the student drive in room 009 before it is due.
11. Use mastering techniques to finalize your mix.
12. 5% of grade is awarded for presenting your work in class.

Option 2: Combined Final Animatic Project
Description:
The Combined Final Animatic is a one minute visual piece and a second project without visuals. This is intended to satisfy those of you who wish to try your hand at some music or experimentation with Reason.
Due: Session 2, Week 11
Points: 50

1. Minimum length is 1:00. If working in groups of two 2:00.
2. A minimum of 6 panels if creating animatic (12 if paired) are required. Other visuals are acceptable including flash animation, slide shows, video, etc.
3. Use ProTools LE (with mBox) or ProTools 24 (in 007) to produce your audio.
4. Use foley techniques to records 50% of your Sound Effects.
5. A one page script is required which includes dialogue and, more importantly, sound design notes.
6. Compile your project in one of the following accepted formats: .mov, .mpeg, .avi, or .swf
7. A minimum of 10 tracks of audio in ProTools is required.
8. Include 2 screenshots of your ProTools work in progress with your project (command+shift+3 creates a screenshot on the desktop).
9. produce a 2nd non-visual audio piece, the minimum length for the 2nd project is 3 minutes (without visuals).
10 . Try to maintain the highest possible audio quality. For MP3s do not compress your audio any more than 44.1khz and 128Kbps. Wave files should be rendered as 44.1k 16bit.
11. Copy your project with screen shots to the student drive in room 009 before it is due.
12. Use mastering techniques to finalize your mix.
13. 5% of grade is awarded for presenting your projects in class.

Week 6

Session 1: Let’s listen to and discuss the multitrack project. Explain what you learned in the process of combining several tracks of audio. What sort of difficulties did you encounter and how did you use signal processing to improve the quality of your project?

If you’re in the animation program your “Animatic Project” may involve synchronizing lip movements with dialogue. This article is an excellent introduction to basic lip sync positions and techniques used to make an animated character appear to speak pre-recorded dialog.

Lip Sync Animation
Lip-Synching for Character Animation

If you are planning on using Flash there are several ways to make sure your sound is Synchronized properly. The best way is to enable “Stream” on the first keyframe of your sound layer. This may cuase Flash to drop frames, but the synchronization will be maintained. The following link has details on how to maintain the synchronization of audio in Flash.

What are some ways to synch audio in Flash?

Session 2: Today we’ll be taking the Audio Production Midterm Quiz. The quiz is worth 15 points toward your grade. Midterm grades are due this week and will be based on the following: the loop exercise, the SFX project, the audio software essay, the multi-track project, and listening exercises.

Reading:
Wikipedia MIDI Resources
Real World Digital Audio Chapter 8 MIDI: Notes, Rhythms, and Physical Control

Week 7

Session 1: MIDI stands for Musical Instrument Digital Interface, but is used for much more than connecting instruments and computers. MIDI has far exceeded its expectations at it’s conception. Today we’ll discuss a little about the history of MIDI and how we can make use of this technology in our projects.

Isao Tomita surrounded by pre-MIDI era modular synthesizers

After the MIDI discussion, we’ll take an introductory look at Propellerheads‘ suite of virtual intruments, Reason. Reason is a virtual studio rack with broad variety of instruments, processors, and sequencing tools. It also includes a massive sound bank including everything from orchestral sounds to synthesized effects.

Reading:
http://en.wikipedia.org/wiki/Propellerheads_Reason

Session 2: Today I’ll be demonstrating how to import MIDI files into Reason and setup the MIDI tracks to play specific virtual instruments. Using this technique it is possible to produce your own music starting with a pre-built MIDI file by selecting the instrument sounds you prefer and manipulating the tempo, processing, and textures of the piece. The demo introduces a 15 point Reason project due Session 1, Week 9. The steps for the exercise follow:

1. Open Reason and add a 14:2 channel mixer device to the rack (Create > Mixer).

    Picture 1

2. Import a .mid file into Reason (File > Import > MIDI File). Use www.classicalarchives.com or www.creativecommons.org to find a MIDI file use can use for this exercise. Other sites, like mididb.com have many files available as well.
3. A Combinator is automatically created for each track in the MIDI file.

    Picture 2

4. Create instruments for each of the Combinators by pressing “show devices”.

    Picture 3

  • Right+click on the black rectangle in the Combinator and select an output device
  • Devices that produce pitched instrument sounds include: Subtractor, Maelstrom, Thor, NN-19, NN-XT
  • These devices produce percussive sounds or loops: Redrum (drum computer) and Dr. Rex (loop player)
  • Most other devices are processors of some sort (reverb, compression, etc.)
  • The Matrix is a pattern sequencer

5. Try applying processing as axillary sends.

  • Right+click on the mixer
  • Choose a processor such as the RV7000 for reverb
  • Picture 5

  • Turn up Aux 1 on the mixer for each track you’d like to process
  • Picture 6

6. Also try adjusting the tempo, transposing notes, and applying automation.
7. When you’re happy with your mix, render your document to an audio file named midi_exercise1.wav and copy it to the drop off under John Keston/ca2431/<your name>.

  • Choose File > Export Song as Audio File
  • Choose Reason WAVE File under Format
  • Choose 44,100Hz and 16bit

Week 8

Session 1: Remember to give me paper copies of your scripts today, and in the lab, let’s continue working on the animatic project. Today in lecture we will be viewing the audio production special features for the Lord of the Rings series. These documentaries offer us a glimpse into the world of high budget film audio effects and Foley techniques.

This week I’ll be demonstrating how to use the equipment in the recording studio as well as discussing concepts such as Foley. Check out this website for a list of Foley articles and descriptions of some techniques. http://www.filmsound.org/foley/

Don’t forget to create at least 50% of your sound effects using field recordings, sound design, and/or Foley techniques. The following reading assignments will help you get a clear idea about the process of Foley, and how you can create your own Foley for your project.

What is Foley?
Foley Artist Share Their Secrets
Interview with Dustin DuPilka

Session 2: We’ll be covering audio compression today in our group lessons. Audio compression (not to be confused with file compression) is a way to automatically adjust the dynamics of sound. Mixing multiple tracks of audio can often become difficult when some of the audio has varying or inconsistent levels. Audio compression can help resolve these difficulties. It as also widely over-used, especially in the mastering process resulting in the “loudness wars“. Please look at the following articles regarding compression for more information:

http://en.wikipedia.org/wiki/Audio_level_compression
The Death of Dynamic Range (Atricle on the so called “Loudness Wars”)

Week 9

Session 1: Home recording technology has advanced rapidly over the last few years, making it possible to produce music in your bedroom that’s as high quality (fidelity wise) as any professionally produced music or audio at a fraction of the cost. We’ll be discussing some of the principals of home recording which allow you to cost effectively produce high fidelity audio without having to spend big bucks in a recording studio.

We will also talk about some of the hardware available for home studios. Professional quality audio is currently produced in inexpensive home studios around the world. Professional quality sound cards are available for as little as $129 (see http://www.m-audio.com/). With an inexpensive mixer and some reference monitors you can be on the way to building a “bedroom studio” of your own.

Session 2: How do you import movies into Pro Tools? How do you then display the movie? How do you get the audio from the QuickTime movie onto a track in Pro Tools? This is very important when producing audio for video. These are some of the things we’ll be going over today.

Final Project Milestone #1
Also, today I’ll be asking each of you to demonstrate that you are making progress on the final project. The following is a list of what I am expecting you to illustrate to me during our scheduled lab time today.

1. Show an example of the visuals that you are using for your final project.
2. Open and play a Pro Tools document that includes at least one track of audio.
3. Make sure that you have a master fader applied to your document.

Week 10

Session 1: Reason 2.5 allows you to stack high quality virtual instruments and effects in a virtual “rack” like you’d see in a recording studio. The instruments can be controlled by a MIDI keyboard, or triggered by built in step sequencers. Both of these methods have been demonstrated in class.

The sound quality is fantastic, and the software with a decent computer could take the place of thousands of dollars worth of studio equipment (see www.propellerheads.se for more information). Although Reason has amazing capabilities, you shouldn’t rely on using it exclusively for your final projects. Reason does not allow you send MIDI to external devices, or directly record audio input. Today during the group lessons we’ll experiment with Reason and Rewire within Pro Tools.

Session 2: Mastering is something that ideally is done by a seasoned professional, however, it’s not always possible to afford to pay an experienced mastering engineer. We’ll discuss some of the basics of mastering in class, such as sequencing, sweetening, and loudness. For more information please see the article linked below.

Audio Mastering

In order to complete your final projects you will be required to mix down and render your audio to a two track master. This master will most likely be a .wav or .aiff file which can be transferred to either CD or DVD. This process used to be completely manual, but today we have the aid of computer automation allowing us to produce much more precise mixes in a fraction of the time.

Final Project Milestone #2
Also, today I’ll be asking each of you to illustrate your progress on the final project. The following is a list of what I am expecting you to show me during our scheduled lab time today.

1. Show an example of the visuals and sound combined for your final project.
2. Open and play a Pro Tools document that includes several tracks of audio for the final.
3. Show one example of automation in your document.
4. Demonstrate the use of inserts in your Pro Tools document.

Week 11

Session 1: Let’s begin our final project presentations. Make sure you are prepared by having your project copied to the student drive on the Mac in room 009. Also, be ready to explain your mixing techniques and describe what sort of processing you used to fine tune your audio.

Session 2: On the last day of class we will be continuing our final project presentations. Thanks for your participation. I hope you enjoyed the class as much as I did. Keep your ears open and have a great break!

Recording Studio Notes

The recording studio (Room 009) at Ai was recently upgraded to Pro Tools HD version 7.4.2 with a Control 24 control surface and a Digidesign 192 I/O interface. A software upgrade to version 8 is planned for the system, at which time I’ll update this post to reflect new steps for using the studio. If you’re using the headphone amplifier in the recording room, make sure that “monitor to aux” is pressed on the Control 24.

Getting Started:

  1. After getting a pass card from the Cage, login to the Mac with username: studio and password: studio.
    1. You may need to turn on the projector to see the menus.
    2. To change this under System Prefs > Display > Arrangment drag the menu bar icon to the preferred monitor.
  2. Turn on the Digidesign 192 I/O and wait for it to completely finish its boot process.
  3. Start Pro Tools once all the lights have stopped blinking on the 192 I/O.
  4. Turn on the Mackie monitors with the button on the front of each speaker.
  5. Start a new session in Pro Tools and save it on the Student Drive
  6. Start a new track
    1. Use tracks 1-8 for microphones in sequence
    2. Plug the mics into corresponding inputs on the snake (i.e. 1 -> A1, etc.).
    3. Set the “source” on the Control 24 to “mic” for tracks to record from mics.
    4. Use the “gain” to adjust the input levels before recording
  7. Important: when you are finished turn off the monitors before exiting Protools or shutting down the system.
  8. Set the I/O on your tracks based on the following:
    1. A1, A2, A3, A4, A5, A6, A7, A8 for mono mic input tracks (set source to “mic”)
    2. A1-2 for analog input from the CD player (set source to “line”)
    3. A3-4 for analog input from the DAT deck (set source to “line”)
    4. A5-6 for analog input from the Yamaha keyboard (set source to “line”)
    5. A7-8 for analog input from the internal Mac sound card (set source to “line”)

Using the Fostex FR-2LE

The Fostex FR-2LE field memory recorders are designed to allow you to make high quality recordings outside of the recording studio. The unit requires four AA batteries not provided by the cage. I also recommend using a 1 gig or higher compact flash card to make your recordings (the unit is supplied with a 128mb card that allows for about 11 minutes of stereo audio or 23 minutes in mono).

Recording to the Fostex FR-2LE
1. Install four AA batteries or connect the unit to an AC outlet using the power adapter.
2. Flip the power switch up and release it to turn on the unit.
3. If the compact flash card needs formatting follow these steps (all data on the card will be lost).
    a) Navigate in the menu to “Disk > Format”
    b) Use +/- to move to “FS/BIT Mode”
    c) Choose “BWF44/16” for CD quality
    d) Set the “Track Mode” to either mono or stereo
    e) Choose “[EXECUTE]” and press MENU / ENTER
    f) Choose “[EXECUTE]” again and press MENU / ENTER again

4. Plug your Mic(s) into the Analog in XLR jacks on the left side of the unit.
5. If you are using a condenser microphone that requires phantom power in the menu go to “Setup > Phantom” and set it to “On”.
6. Press the grey “REC STBY” (record standby) button to prepare for recording and check your levels.
7. Use the “MIC TRIM” knobs to adjust your levels.
8. Press the red “REC” (record) button to start recording, “REC STBY” to pause, or “STOP/CANCEL” to stop.

Transferring Your Recording to a Computer
1. Connect a USB cable from the unit to a compter
2. In the MENU go to “USB Mode > USB Device Mode”
3. Drag and drop your recording to the hard drive on the computer
4. You can now import your recordings into Protools.

A Note About Rendering Audio in Pro Tools

Most of the assignments for this class require that you turn in a stereo interleaved wave format file at a sample rate of 44.1kHz and bit depth of 16bit, the same as a standard audio CD. To render audio in this format from the Pro Tools menu choose “File” > “Bounce” > “Audio”. Next, in the dialogue box choose “WAV” under “File Format”, “44.1kHz” under “Sample Rate”, “16 bit” under “Resolution”, and “Stereo Interleaved” under “Format”.

Finally press “Bounce” to name and render the audio. It is important to understand that selecting a range in the “Edit” view before bouncing will only render that range. If you want to render the entire file, don’t select anything. Muting and soloing tracks is also reflected in the bounced audio.